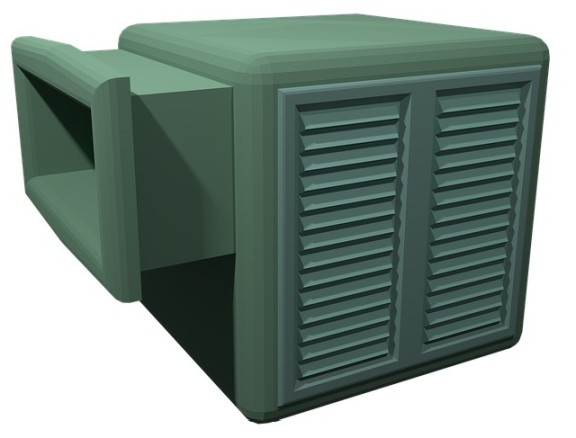
Once you’ve winterized your swamp cooler and made it through the cooler months, you’ll want to de-winterize it. Preparing your evaporative cooler for the warmer months will ensure that it works more effectively. It’s a part of the maintenance process, and it will help to keep your swamp cooler working better when you need it the most.

Table of Contents
Why Should You De-Winterize Your Swamp Cooler?
Preventative maintenance goes a long way to ensuring that your investments are in proper and working order. Once you make the investment into a residential swamp cooler, it’s critical that you take the necessary steps to care for it.
Just as you work to winterize your swamp cooler, you must de-winterize it. This will ensure that it is capable of functioning throughout the hottest of the summer months. Without taking the steps to de-winterize your evaporative cooler, you run the risk that the evaporation process will not work properly.
What Could Happen If You Don’t?
While you may assume that your system will be ready when you are, it is not a gamble that you should make. Many people don’t bother to de-winterize their swamp cooler. Then, a few months into the summer, they regret that decision because of having various issues with the cooler’s performance.
An evaporative cooler has fewer moving parts than a traditional HVAC system. Without the duct work, it’s easier to get up and running. However, it must still be prepped to run in the dry and hot environment that it is being exposed to. It must be expected to push through and operate efficiently when the temperatures are at its hottest.
You don’t want your system to give out when you depend on it the most. As such, it must be prepared. The good news is that de-winterizing your swamp cooler can be done easily. You can choose to take the DIY approach or allow professionals to provide the service for you.
Steps to De-Winterize Your Swamp Cooler
Prior to the hot summer months, you’ll want to de-winterize your swamp cooler. There are a few steps that will need to be done to ensure that everything has been inspected.
A typical service will include:
- Changing out the pads
- Cleaning out dust and debris
- Connecting the water line
- Checking on the connections
To be sure that you take care of it all, there’s an order to follow.
Step 1: Uncover the Cooler & Remove the Case
If you sufficiently prepped the swamp cooler for the winter, there will be a tarp or cover that needs to be removed from the unit. This can be stored away until winter.
Then, you’ll need to remove the sides of the cooler by releasing the panels. Be sure to keep the panels organized so you know where each one goes when it’s time to reassemble.
Step 2: Clean the Inside
Use a shop-vac to clean the inside of the cooler. There will be dust and even mineral scale that should be removed. Use a rag to get the dust in the corners. If you find a significant amount of buildup, consider using a descaler designed for evaporative coolers. Further, if you see rust, it may be a sign that there is a leak somewhere within the system.
Step 3: Replace Evaporative Pads
The evaporative pads should be replaced. They may have become stiff with mineral deposits, which means that they’re not going to be able to hold water effectively. Be sure you get ones that are designed specifically for your unit to get a good fit. The pads should be changed at least once a year. If you already changed them in the winter, you could decide whether they need to be changed again.
Step 4: Connect the Water Line
During the winterization process, you disconnected the waterline. Now, you’ll want to reconnect it. You may need a wrench or pliers to get it tight. Once it’s in place, be sure that the drain plug is securely in the water pan. Then, go ahead and turn on the water supply to the evaporative cooler.
Step 5: Test the Unit
At this point, you’ll want to see if there are any leaks. If there is a broken or punctured pipe, you’ll notice water leaking slowly. You should also check to see if the float valve is working properly – once the cooler pan gets full, it should turn off. You may need to make adjustments or replace the float valve entirely.
Conduct a full test of the unit. Turn the cooler on and be sure that both the fan motor and the pump are working properly. If you find that water flow is sluggish, there may be a clog in the line.
Once you’ve checked that everything is working the way that it should, reinstall the casing on the unit. You’ll want to secure all of the panels with the catches or clips that are in place (or replace them if they have broken).
If you find that the process is too complicated or you are concerned about things going wrong, call for professional installation service.
Our experts at Premier Industries, Inc. can ensure that all of the components are clean, connected, and working properly. We can identify warning signs that would lead to operational issues. We’ll de-winterize your unit and address any issues to ensure your unit works properly throughout the hottest months, offering you cooler temperatures and sufficient levels of humidity.
Get Help with Swamp Cooler Installation
Dealing with a swamp cooler doesn’t have to be complicated. Whether you already have one or you’re in the market for one, we can help at Premier Industries, Inc. For decades, we’ve been helping commercial, industrial, and residential customers with evaporative coolers.
We can help you with installation, including installing it in a window or wall. We offer competitive prices and are a family-owned and operated business. We’ll help you with the entire installation process and show you the various maintenance services that should be performed.
Call us today to learn more about installing a swamp cooler. And, if you already have one installed, let us help with de-winterizing your unit so you can prepare for the warmer months ahead.


